Hello, everyone! Recently, I have gotten a number of question about the use of Infoboxes, so I thought I'd make a complete, cohesive guide to cover all steps in making one. It will cover using infoboxes in both Visual and Source Coding, and have a small section on Other Infoboxes. So, let's get this show on the road!
- To see the pictures in their full size, please click the thumbnails!
Getting started[]
The first thing you want to do before making an infobox is preferably finding out what information you want to put in it!
Then, you must naturally open the edit screen of your page. Now comes the hard part!
Adding the Infobox[]

Visual[]
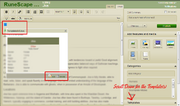
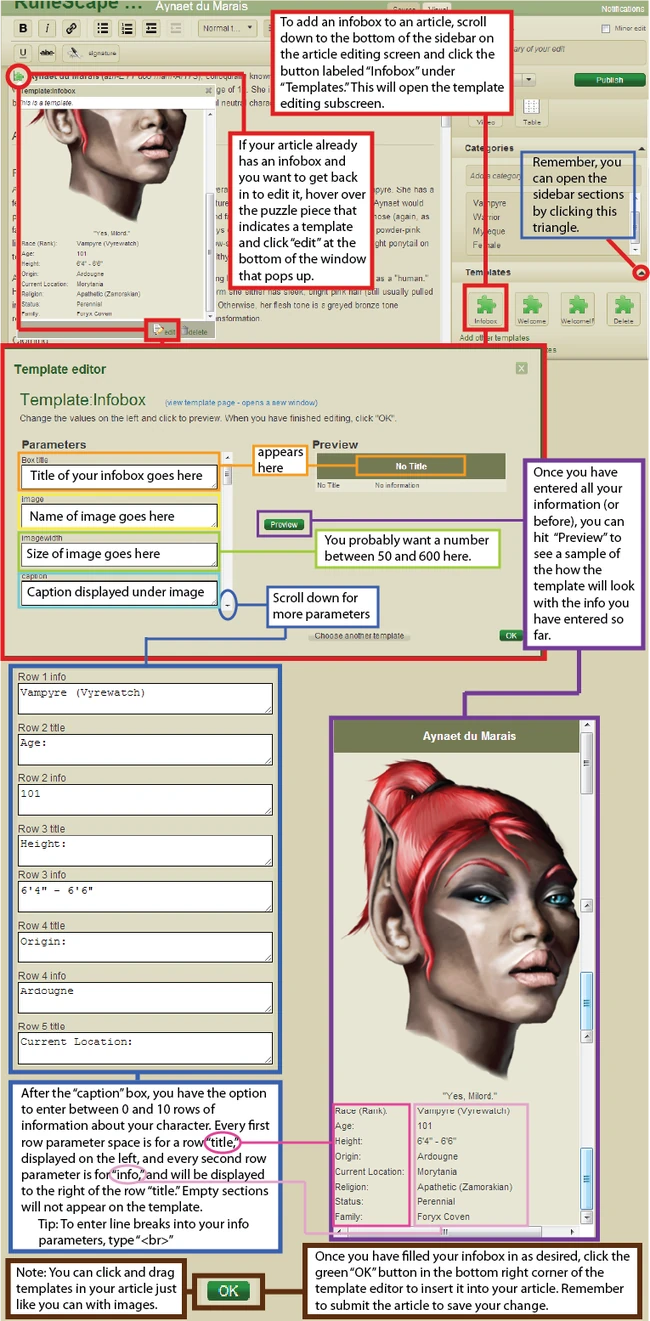
As the picture on the right suggests, the Infobox Template (appearing as a small green puzzle piece while editing) is located on the right hand side of your edit menu- just scroll down from the picture options to find the default templates. The Template:Infobox should be on the far left, as shown.
Source[]
Making an infobox in Source Code is easy! The only thing you have to do is to type
{{infobox}}
And you have made your very own infobox! There's nothing in it, though. But we're getting to that now!
Adding to the Infobox[]

Visual[]
Now that you have your template (green puzzle piece), you should left-click on it (which should show a small popup with the contents of the infobox) and choose 'edit' on the bottom.
You are now in the Template Editor! Welcome to the real work. The options set before you influence a number of different factors, and I will here describe the most important ones:
Align: This field decides whether you want the infobox on the left, right or center of the page- but it is not really important. If you leave it blank, the infobox template will align to the right of the page by default.
Box Title: This field is where you place the heading of the Infobox- for a character page, the name of your character. It is meant to tell you what the information within the infobox is about.
Image: This is one of the trickiest fields in the box, and will get its own section in the guide. Here, you will place the image that you want the image field of your infobox to display.
Imagewidth: This field decides how wide your picture will show in pixels. This defaults to 250px, so be careful when adding pictures smaller than this; they will be rescaled and might be pixelated.
Caption: This field is much easier; it simply is the caption of the picture (the short text that describes and goes along with the image). Write whatever you want, a quote, a notation to the picture.
'Row x title: This is quite easy; the left section of texts in the infobox. These are displayed in bold, and will be used to say what information comes to their left.
Row x info: This is simply the corresponding information to the title you have placed in the relevant row title.
- Farther down is a number of suggestions as to what to place in the rows of information.
Source[]
Creating the infobox with all its sections is harder to do in source mode, and you have to know what you're doing (unless you have somewhere to copy it all from). However, once you have the hang of it, it's not all that bad!
The important bit to remember is that you will be writing a lot more this way. For your convenience, I have here written down all the code you need for a perfectly normal infobox- just copy and paste it, fill in the blanks and you're all set!
{{Long Infobox
|Box title =
|image =
|imagewidth = 250
|caption =
|Row 1 title =
|Row 1 info =
|Row 2 title =
|Row 2 info =
|Row 3 title =
|Row 3 info =
|Row 4 title =
|Row 4 info =
|Row 5 title =
|Row 5 info =
|Row 6 title =
|Row 6 info =
|Row 7 title =
|Row 7 info =
|Row 8 title =
|Row 8 info =
|Row 9 title =
|Row 9 info =
|Row 10 title =
|Row 10 info =
|Row 11 title = }}
Images in Infoboxes[]

Yes, this deserves its own section. Adding a picture to an infobox is rather complicated, both in Visual as well as Source Mode. Here comes the easy, step-by-step guide to the picture you want to your infobox!
- Find the picture you want to use.
- Find/Copy its file name (This will be a name such as "example.jpg")
- Write into the "image" section (Source and Visual Mode): "File:(your picture's file name)"
(( EXAMPLE: File:example.jpg )) - Finished! You have now added your picture to the infobox. Well done!
What to add[]
Here is a suggestion of items to add as titles in your infobox.
- Note: This suggestion uses more than ten options. In a regular infobox, the one this guide is referring to, you can only operate with 10.
|Row 1 title = Creator
|Row 1 info =
|Row 2 title = Origin
|Row 2 info =
|Row 3 title = Race
|Row 3 info =
|Row 4 title = Age
|Row 4 info =
|Row 5 title = Gender
|Row 5 info =
|Row 6 title = Religion
|Row 6 info =
|Row 7 title = Occupation
|Row 7 info =
|Row 8 title = Status
|Row 8 info =
|Row 9 title = Height
|Row 9 info =
|Row 10 title = Hair Color
|Row 10 info =
|Row 11 title = Eye Color
|Row 11 info =
|Row 12 title = Alignment
|Row 12 info =
Visual explanation[]
Other Infoboxes[]
On the Wiki, we have several other infoboxes to use. These include the Infobox War, Infobox Location, Long Infobox and the Switch Infobox.
Long Infobox[]
The Long Infobox has absolutely no special features beyond the regular infobox I have described in this guide, except that it allows for up to 25 pieces of information instead of 10.
Infobox War[]
The Infobox War is an infobox for wars, obviously. It lists important battles, two sides with commanders, losses, previous and later wars.
Infobox Book[]
This Infobox details a book; it allows for a picture and defaults its name to the page name. Be careful only to use it on a book page, therefore. It lists the author, illustrator, preceding and following books and the publisher.
Infobox Location[]
The Infobox Location describes a location: it contains two pictures, an overview and a map. The statistics listed are type, level, inhabitants and location.
Switch Infobox[]
To use this clever bit of coding which allows you to display multiple options, please read the relevant guide, made by SsVivid, Lothorian Foryx and Myself.


